How To Install An RV Window? Step By Step Guide
Are you looking for How To Install An RV Window? Installing an RV window can be a rewarding DIY project, enhancing your vehicle’s comfort and functionality. The process, while detailed, is manageable with the right tools and preparation. In this guide, we’ll walk through the essential steps to successfully install an RV window, ensuring a secure and efficient upgrade to your recreational vehicle.
Key Takeaways
- Essential Tools: Screwdriver, putty knife, silicone sealant, tape measure, and painter’s tape.
- Window Removal: This involves removing the interior trim ring and the old window, followed by cleaning the opening.
- Dry Fitting: Ensures the new window fits correctly in the opening.
- Applying Putty Tape: A crucial step for a watertight seal.
- Window Installation: Involves aligning and securing the new window with screws and trim ring.
- Sealing: Applying silicone sealant for extra protection against water damage.
How To Install An RV Window?
Preparing for Installation
Before beginning the installation, gather the necessary tools including a Philips screwdriver, putty knife, silicone sealant, a ruler or tape measure, and painter’s tape. It’s important to ensure that the replacement window and all required parts are at hand.
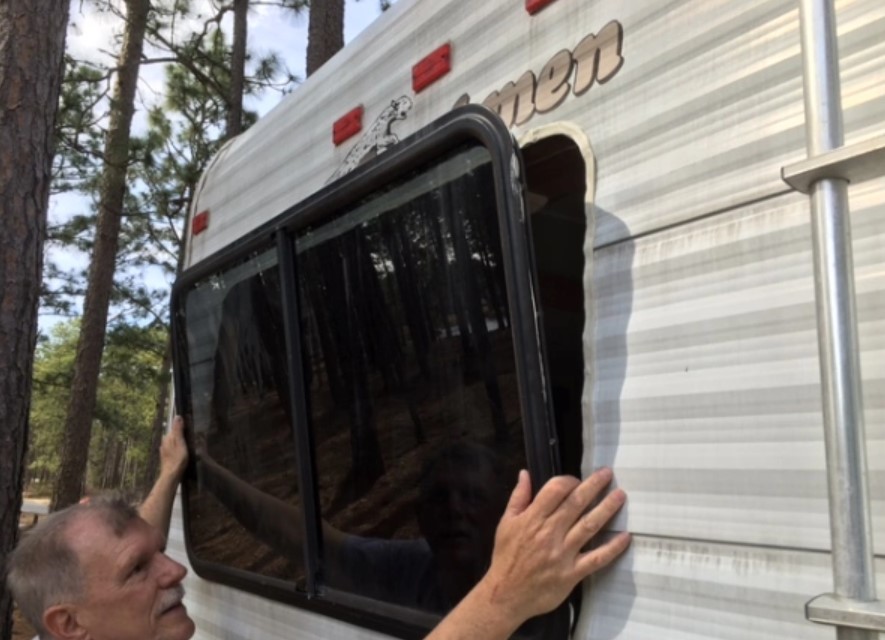
Removing the Old Window
- Interior Trim Ring Removal: Start by taking off any window coverings and then proceed to unscrew and remove the interior trim ring.
- Window Removal: If the window is still adhered after screw removal, use a putty knife to gently pry it loose.
- Cleaning the Area: Once the old window is out, clean the area around the window opening to ensure a smooth installation of the new window.
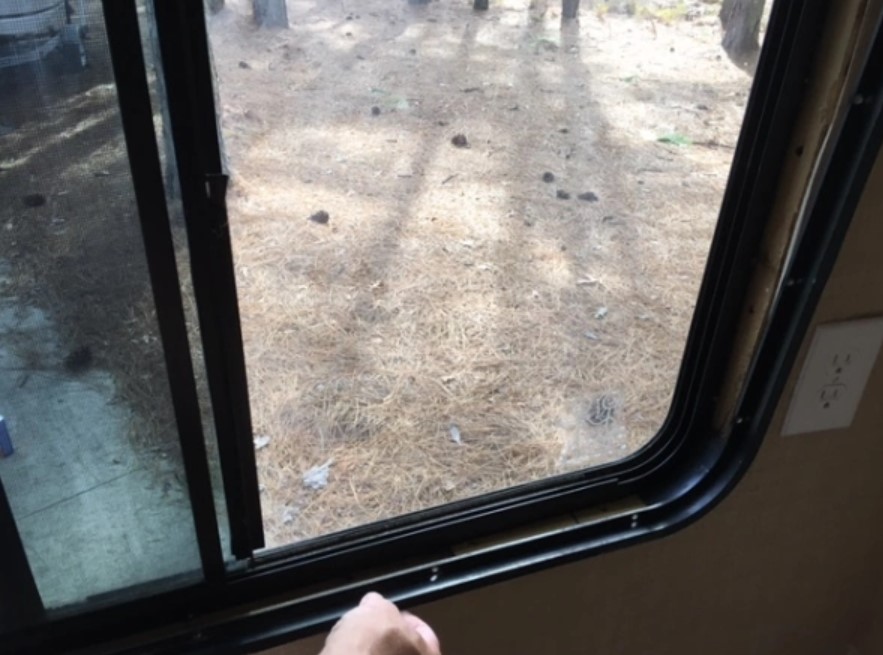
Fitting the New Window
Drying the new window is essential. Place it in the opening without any sealant to check for proper alignment and fit. Measure the overlap of the window frame over the RV sidewall, ensuring at least a 3/8″ overlap for a proper seal.
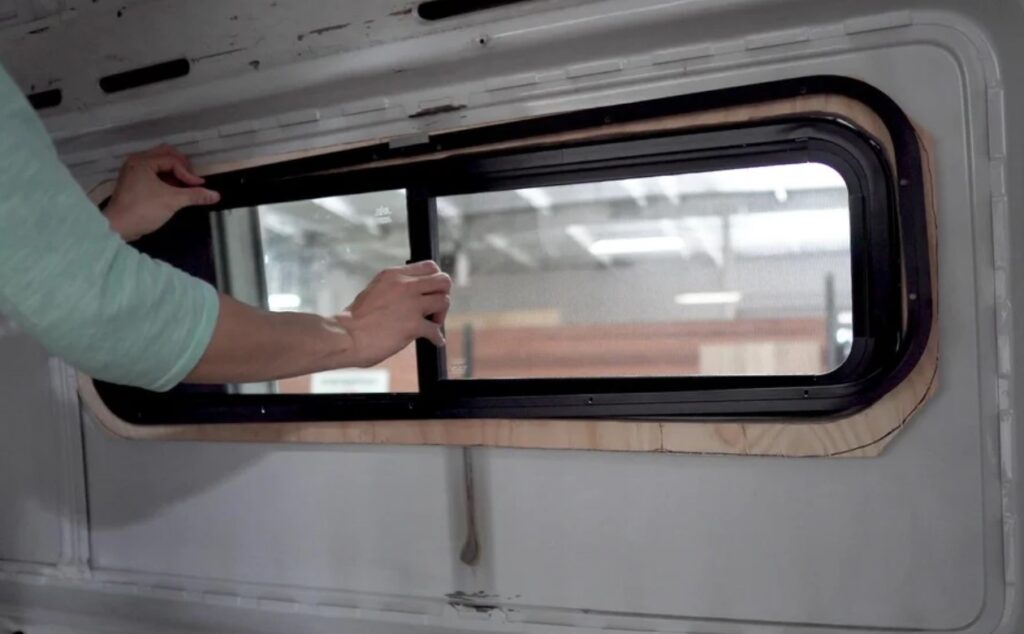
Installation Process
Applying Putty Tape
Carefully apply the putty tape to the RV sidewall around the window opening. Excess tape is preferable to too little, as it ensures no gaps for water ingress.
Setting the New Window
Wet the interior surface of the window flange using a spray bottle. This prevents sticking and allows for adjustment. Align the window in the opening, ensuring it’s centered.
Securing the Window
From the interior, align the trim ring and begin fastening it with the supplied screws. Start with the corners and work your way around the perimeter.
Final Sealing
Apply a bead of silicone sealant around the window frame on the outside for an additional layer of protection against water leakage. Ensure the sealant is smooth and even for effective sealing.
Can RV Windows Be Replaced?
Yes, RV windows can indeed be replaced. Window replacement is a common upgrade or repair in RVs. This replacement process allows RV owners to address issues like broken windows, improve insulation, or even upgrade to newer window models for better functionality and aesthetics.
The process involves removing the old window, preparing the window opening, and installing the new window with appropriate sealants and fasteners. It’s important to ensure the new window is of the right size and type for your specific RV model.
What Do You Use To Seal RV Windows?
To seal RV windows effectively, a combination of putty tape and silicone sealant is commonly used. Putty tape is applied to the RV sidewall around the window opening to ensure a watertight seal between the window frame and the RV’s exterior.
After the window is installed, a bead of silicone sealant is typically applied around the exterior window frame. This additional sealant layer provides extra protection against water leakage and is especially important in RVs, where water damage can be a significant issue.
Both the putty tape and silicone sealant must be applied carefully to prevent gaps and ensure a durable seal.
Do You Install Replacement Windows From The Inside Or Outside?
The installation of replacement windows in an RV is typically initiated from the outside but requires work from both the inside and outside.
The process begins with the removal of the old window, which is usually done from the inside by removing the interior trim ring and then pushing the window out from the inside.
The new window is then placed into the opening from the outside, ensuring it is properly aligned and centered. The final securing of the window, involving the fastening of the interior trim ring with screws, is done from the inside.
This method ensures that the window is properly sealed and secured against both the interior and exterior surfaces of the RV.
Conclusion
Successfully installing an RV window requires patience, precision, and the right tools. By following these steps, you can ensure a secure and effective installation, enhancing your RV experience. Remember, each RV and window type may have its specific requirements, so adjust the process as needed for your particular setup.
Top FAQ’s
What are the common mistakes to avoid during RV window installation?
Common mistakes include not cleaning the window opening thoroughly, improper alignment of the window, not applying enough putty tape, and uneven screwing of the trim ring, which can lead to leaks or damage to the window or RV sidewall.
Can I install an RV window by myself?
While it’s possible to install an RV window by yourself, having a helper can make the process easier, especially when holding the window in place during removal and installation.
Should I apply sealant after installing the RV window?
Yes, apply a bead of silicone sealant around the exterior window frame. This acts as an additional barrier against water leakage and ensures a long-lasting seal.
How do I secure the new window in place?
Once the window is correctly aligned, secure it from the inside with the trim ring and screws. Start with the corners and work around the perimeter, ensuring an even distribution of pressure.

Welcome to the exhilarating world of Matt Rex, a professional car racer turned renowned vehicle enthusiast. Immerse yourself in his captivating blog as he shares heart-pounding adventures, expert reviews, and valuable insights on cars, trucks, jets, and more. Fuel your passion for speed and discover the beauty of vehicles through Matt’s engaging stories and meticulous expertise. Join the ever-growing community of enthusiasts who find inspiration and expert advice in Matt Rex’s blog—a digital hub where the thrill of speed meets the pursuit of knowledge.